Step 1 - Implement a Phase Data Field
A new data field must be added to the Tasks entity as follows:
Note: when the field is added the Field Type must be Custom List and must be linked to a custom list containing all the required Project Phases.
Step 2 - Set up the phase field in MSP
The phase field can be added to MSP by implementing the Number20 field.
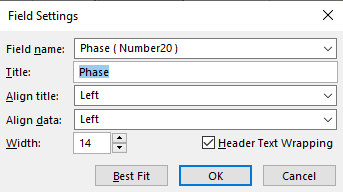
Now edit the custom field settings by right-clicking on the column heading and selecting Custom Fields. Change the custom attributes by selecting the Lookup option: click on the Lookup button to define the options.
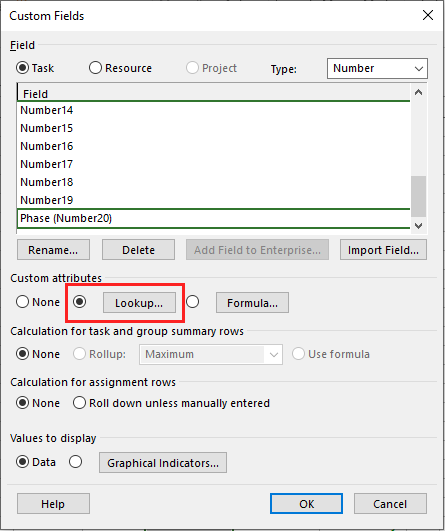
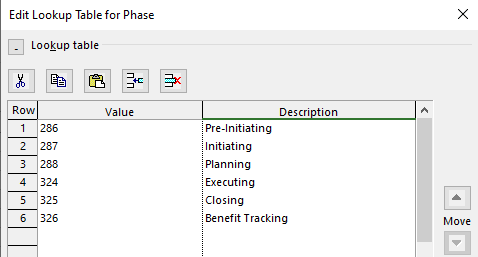
Specify the value and descriptions of the lookup according to the phase custom list in PPO. The value field in MSP should show the custom list item key. This key can be found on the Custom List View page under the Administration menu. The description field in MSP should show the custom list item caption.
Once completed the Lookup table will look like this:
The Phase field will now show a dropdown of phase options that can be selected in order to indicate which project Phase each Task falls in.

Step 3 - Map the Phase field to PPO
In order for this field to be imported into PPO the MSP field needs to be mapped to the PPO field on the Task Import Field under the System Configuration:
Note: in the example above the PPO field is T03 and the MSP field is tasknumber20.
Step 4 - Import the Project Plan into PPO
Import your Microsoft Project (MSP) plan into PPO. The phase field from MSP will be imported into the PPO data field: